Add a GitHub Action
Follow these steps to create a GitHub Action that collects metrics from the GitHub API and posts the metrics to the metrics tracker Azure Function App webhook.
Navigate to the GitHub repo that you want to track metrics for.
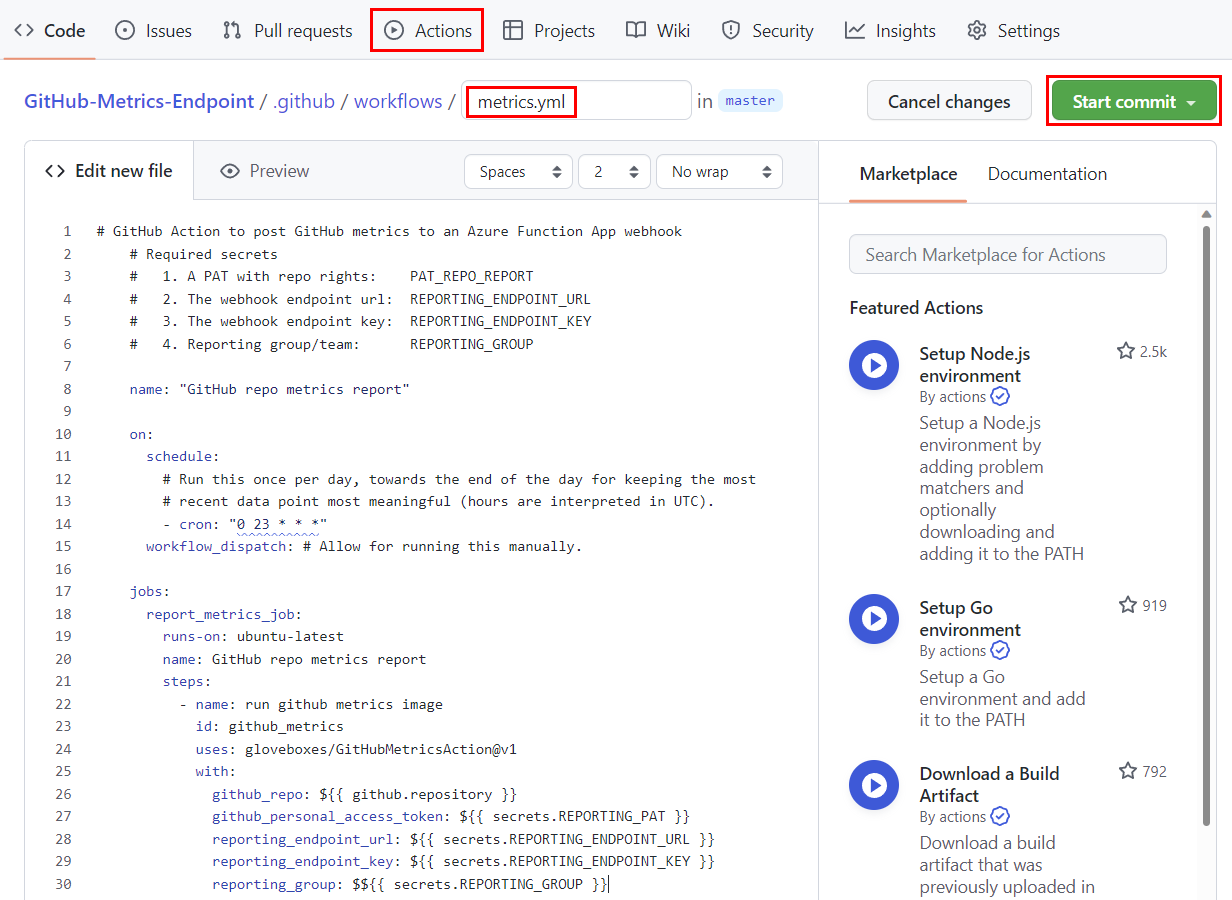
Select Actions from the repo menu.
Select New workflow.
Select Set up a workflow yourself.
Name the workflow metrics.yml.
Copy the following code into the editor.
# GitHub Action to post GitHub metrics to an Azure Function App webhook
# Required secrets
#   1. A PAT with repo rights:    PAT_REPO_REPORT
#   2. The webhook endpoint url:  REPORTING_ENDPOINT_URL
#   3. The webhook endpoint key:  REPORTING_ENDPOINT_KEY
#   4. Reporting group/team:      REPORTING_GROUP

name: "GitHub repo metrics report"

on:
  schedule:
    # Run this once per day, towards the end of the day for keeping the most
    # recent data point most meaningful (hours are interpreted in UTC).
    - cron: "0 23 * * *"
  workflow_dispatch: # Allow for running this manually.

jobs:
  report_metrics_job:
    runs-on: ubuntu-latest
    name: GitHub repo metrics report
    steps:
      - name: run github metrics image
        id: github_metrics
        uses: gloveboxes/GitHubMetricsAction@v1
        with:
          github_repo: ${{ github.repository }}
          github_personal_access_token: ${{ secrets.REPORTING_PAT }}
          reporting_endpoint_url: ${{ secrets.REPORTING_ENDPOINT_URL }}
          reporting_endpoint_key: ${{ secrets.REPORTING_ENDPOINT_KEY }}
          reporting_group: $${{ secrets.REPORTING_GROUP }}
Select Start commit.
Select Commit new file.

Test the GitHub Action
Select Actions from the repo menu.
From the Actions menu, select GitHub repo metrics report.
Select Run workflow, then select Run workflow again.
Check that the workflow completes successfully. The GitHub Action will show a green checkmark if the workflow completes successfully.
GitHub Actions Keep Alive
If there is no activity on a repo for 60 or more days then GitHub disables the repo Actions and the metrics reporting Action will no longer run. To address this issue, add the Keep-Alive GitHub action. On the 1st of each month, the Keep-Alive Action will run, and update the .stats_timestamp file with the current UTC, and the change will be committed and pushed to the repo to create an activity. The Keep-Alive Activity will stop GitHub from disabling the repo Actions.
Navigate to the GitHub repo that you want to track metrics for.
Select Actions from the repo menu.
Select New workflow.
Select Set up a workflow yourself.
Name the workflow metrics_keepalive.yml.
Copy the following code into the editor.
# GitHub Actions go to sleep after 60 days of no activity
# This action runs every month and updates the .stats_timestamp with the current UTC
# This will generate activity on the repo
# This activity will keep the git hub repo metrics action alive

name: "GitHub repo metrics report keep alive"

on:
  schedule:
    # Run this once per day, towards the end of the day for keeping the most
    # recent data point most meaningful (hours are interpreted in UTC).
    # https://cron.help/every-month
    # Action run midnight UTC 1st of each month
    - cron: "0 0 1 * *"
  workflow_dispatch: # Allow for running this manually.

jobs:
    resources:
        name: Update the repo metrics timestamp
        runs-on: ubuntu-latest
        steps:
            - uses: actions/checkout@v3

            - name: timestamp
              run: date -Iseconds -u > .stats_timestamp

            - name: Update stats timestamp
              run: |
                git add .stats_timestamp
                git config user.name "github-actions[bot]"
                git config user.email "41898282+github-actions[bot]@users.noreply.github.com"
                git commit -am "Repo Stats Timestamp"
                git push
Select Start commit.
Select Commit new file.
Enable r/w workflow permissions
The keepalive action requires read and write permissions.
- Navigate to the repo
settingstab. - Select
Actionsfrom the left hand menubar. - Select
General - Scroll down to
Workflow permissions - Select
Read and write permissions - Seletc
Save.