Start the Home Assistant
Platform support
The Home Assistant app has been tested on the following platforms:
- Windows 11 (x64, latest updates)
- macOS Ventura (Apple Silicon, latest updates)
- Ubuntu 20.04 (latest updates)
Clone the repository
Install Git from https://git-scm.com/downloads.
Clone the repository:
git clone https://github.com/gloveboxes/OpenAI-Whisper-Transcriber-Sample
Environment file
You'll find a .env file in the client folder of the repo you cloned. This file contains the configuration settings for the Home Assistant app.
The following keys are defined in the .env file:
| Key | Description |
|---|---|
| OPENAI_API_KEY | The OpenAI API key. |
| WEATHER_API_KEY | The Weather API key. |
| WHISPER_MODE | The Whisper speech to text transcriber mode. The default mode is local. |
| WHISPER_MODEL_NAME | The Whisper speech to text transcriber model name. The default model is tiny. This is only used when the WHISPER_MODE is set to local. See Whisper models for more information. |
| WHISPER_ENDPOINT | The Whisper speech to text transcriber endpoint. This is only used when the WHISPER_MODE is set to gpu. |
| WHISPER_API_KEY | The Whisper speech to text transcriber API key. This is only used when the WHISPER_MODE is set to gpu. |
Cloud API Keys
The Home Assistant uses the following cloud services:
- OpenAI chat and depending on your configuration, the
Whisperspeech to text transcriber. The OpenAI API key is used to call the OpenAI Chat Completion API and extracting OpenAI Functions. - The Weather API to get weather data. This data is used to
groundthe GPT prompts the assistant generates.
Next you will need to create accounts and get API keys for the cloud services. The API keys are stored in a .env file in the client folder of the repo you cloned. As you create the API keys, add them to the .env file.
OpenAI API
Create an OpenAI account and get an API key.
- Sign up for an OpenAI account.
- Create an OpenAI API key.
- Update the OPENAI_API_KEY key in the
.envfile with the API key. - Save the updated
.envfile.
Weather API
Create a Weather API account and get an API key.
- Sign up for a Weather API account.
- Create a free Weather API key.
- Update the WEATHER_API_KEY key in the
.envfile with the API key. - Save the updated
.envfile.
Install prerequisites
- Install Python version 3.8 ~ 3.10. The Whisper library is supported on Python 3.8 to 3.10.
Install OS Dependencies
Linux
sudo apt-get install portaudio19-dev python3-pyaudio python3-tk
Install the required Python packages:
From the command line, change to the
clientfolder of the repo you cloned.cd OpenAI-Whisper-Transcriber-Sample/clientCreate a Python virtual environment:
Windows
python -m venv .assistantLinux and macOS
python3 -m venv .assistantActivate the Python virtual environment:
Windows
./.assistant/Scripts/activateLinux and macOS
source .assistant/bin/activateInstall the required Python packages:
pip install -r requirements.txtOn Windows, by default, the
requirements.txtfile will install the CPU version of PyTorch. If you have an NVidia GPU, you can install the CUDA accelerated version of PyTorch.First uninstall the CPU version of PyTorch:
pip3 uninstall torch torchvision torchaudioInstall the CUDA accelerated version of PyTorch:
Review the PyTorch website for the latest installation instructions.
pip3 install torch torchvision torchaudio --index-url https://download.pytorch.org/whl/cu117
Set the Text to Speech Transcriber mode
There are three modes to use Whisper speech to text transcriber. The default mode is local. You can change the mode by updating the WHISPER_MODE key in the .env file.
local: The Whisper speech to text transcription is done locally on the device. This is the default mode and free mode. The speed will depend on the hardware capabilities of your computer. The first time the Whisper speech to text transcriber is used, it will download the transcriber model from the internet. This will take a few minutes.openai: The Whisper speech to text transcription is done using the OpenAI API Audio service which maybe a lot faster that transcribing speech on your computer. This is a paid service, review OpenAI Audio Model Pricing for more information.gpu: You can run a Whisper REST endpoint on your own NVidia GPU. For more information, review the Whisper REST API docs.
Run the home assistant app
Ensure the Python virtual environment is activated.
From the command line, change to the
clientfolder of the repo you cloned.Run the home assistant app:
python assistant.pyThe App will start, select your preferred microphone from the dropdown menu.
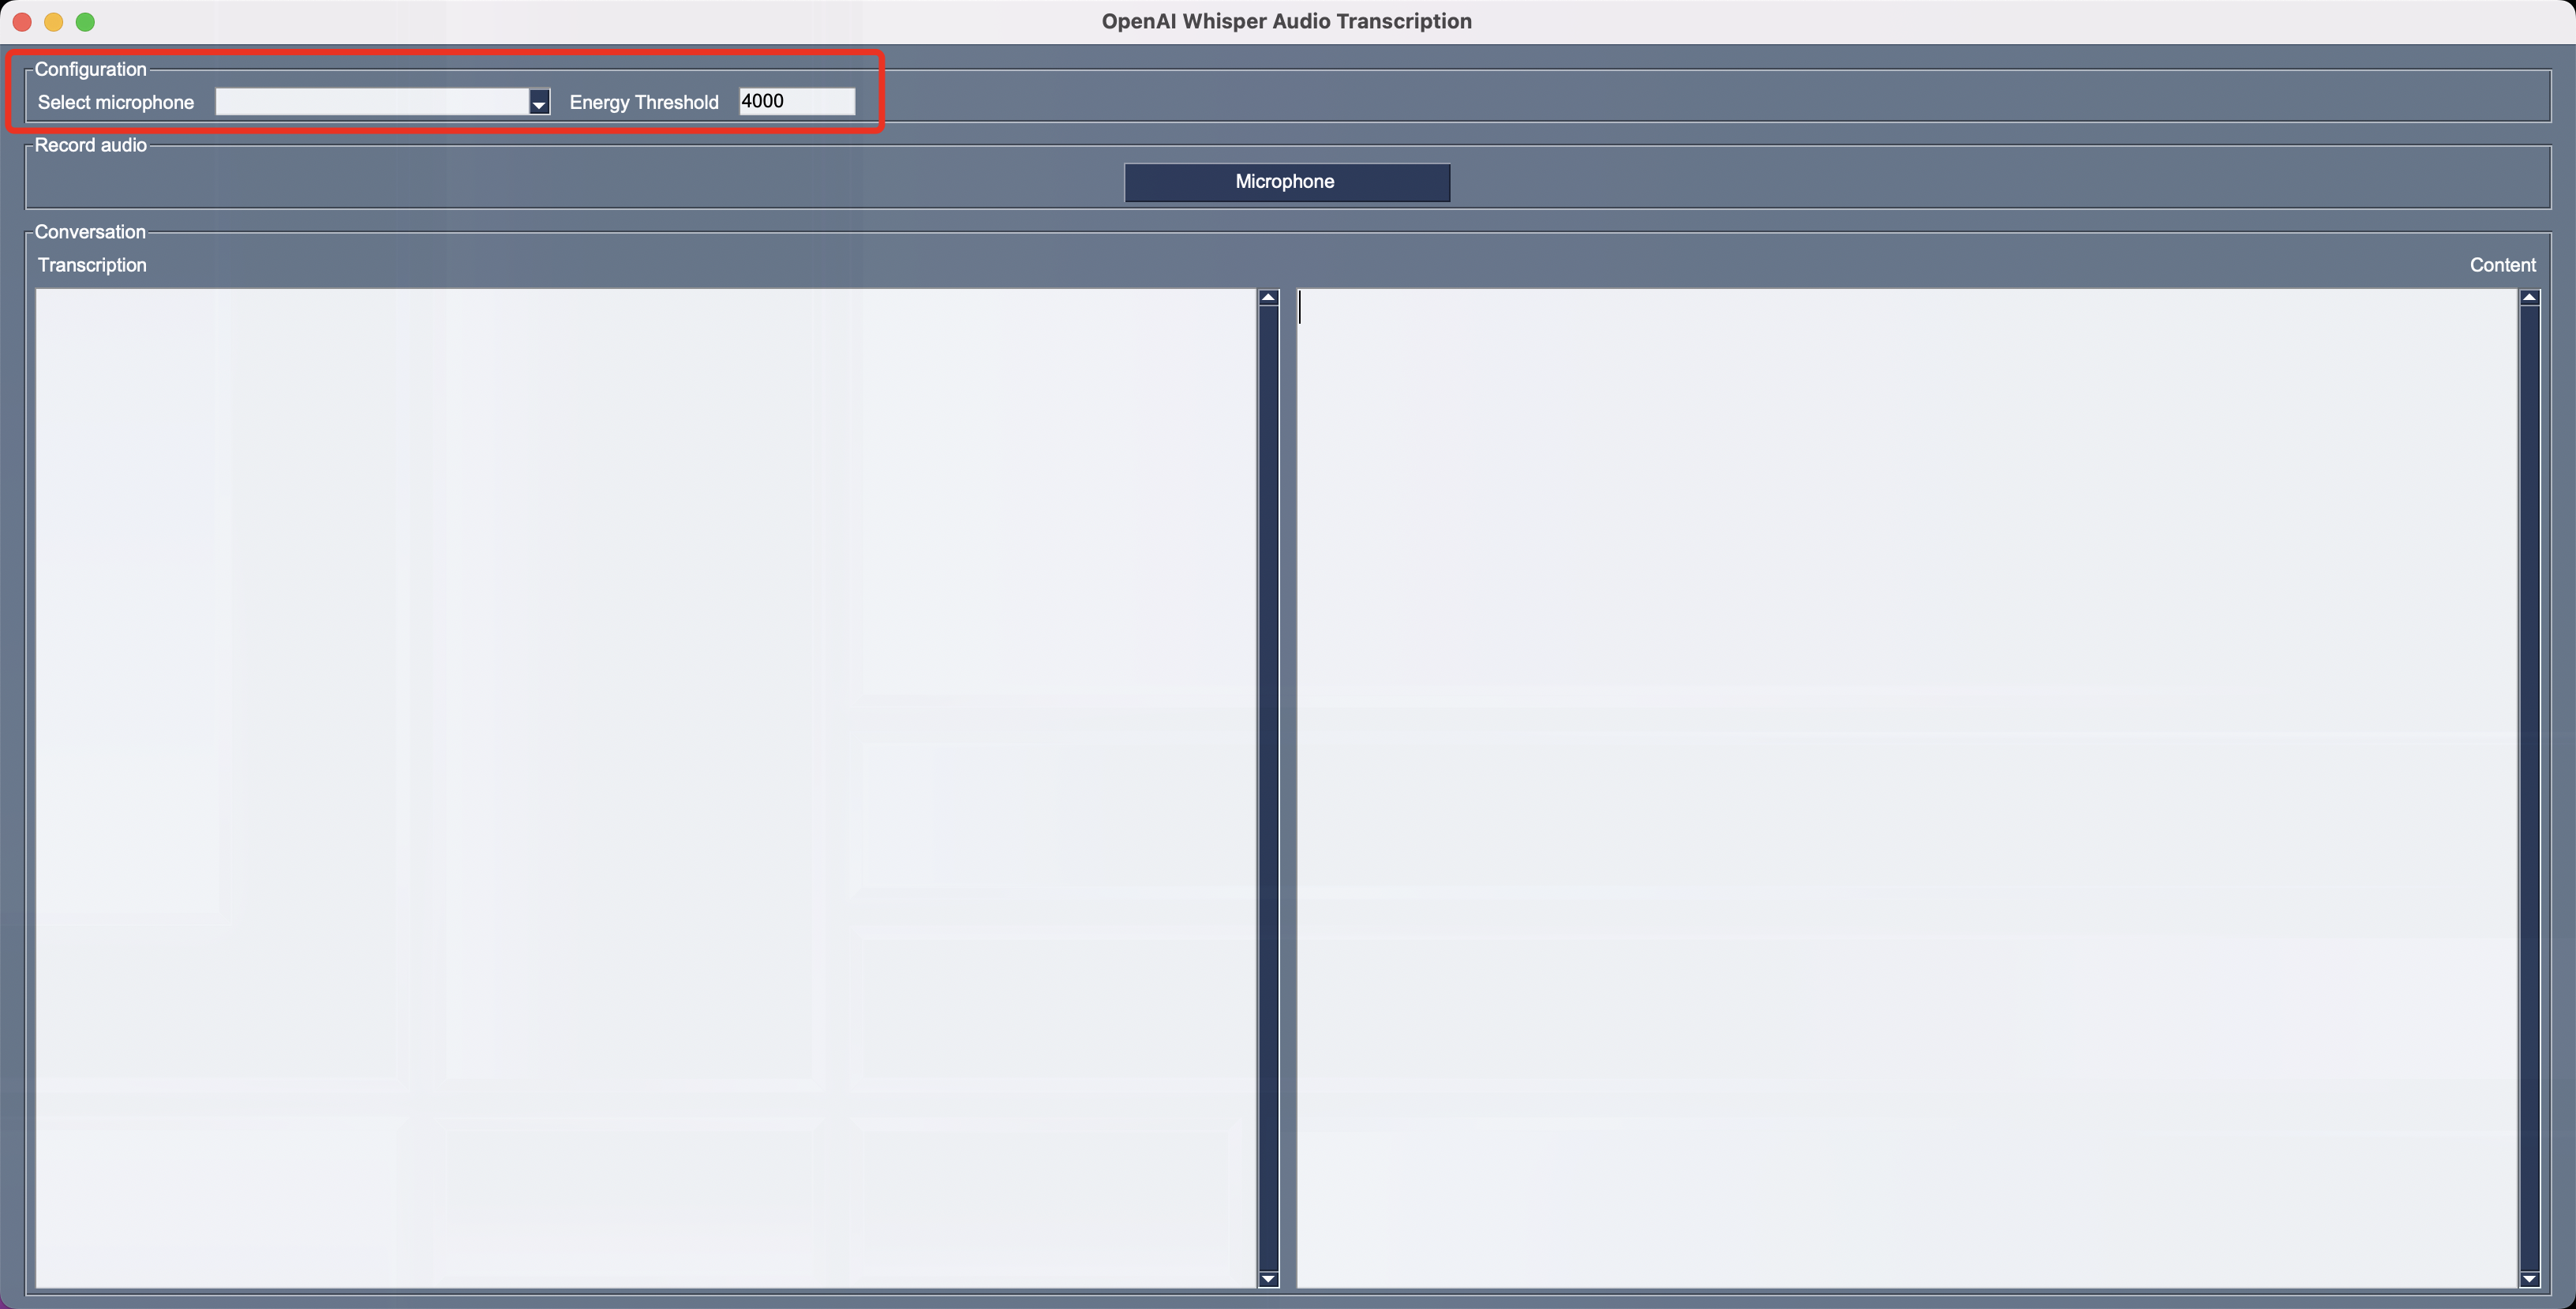
You can tweak the
Energy Threshold. The Energy Threshold represents the energy level threshold for sounds. Values below this threshold are considered silence, and values above this threshold are considered speech. For more information on this setting, review recognizer_instance.energy_threshold.Press
Microphonebutton to start listening for your voice commands. Try out a few commands like:- What's the weather in Seattle
- How can you help me
- Turn on the living room lights
- Turn in the living room lights set the color to orange and brightness to dim.
- Turn on the washing machine
- Lock the front door
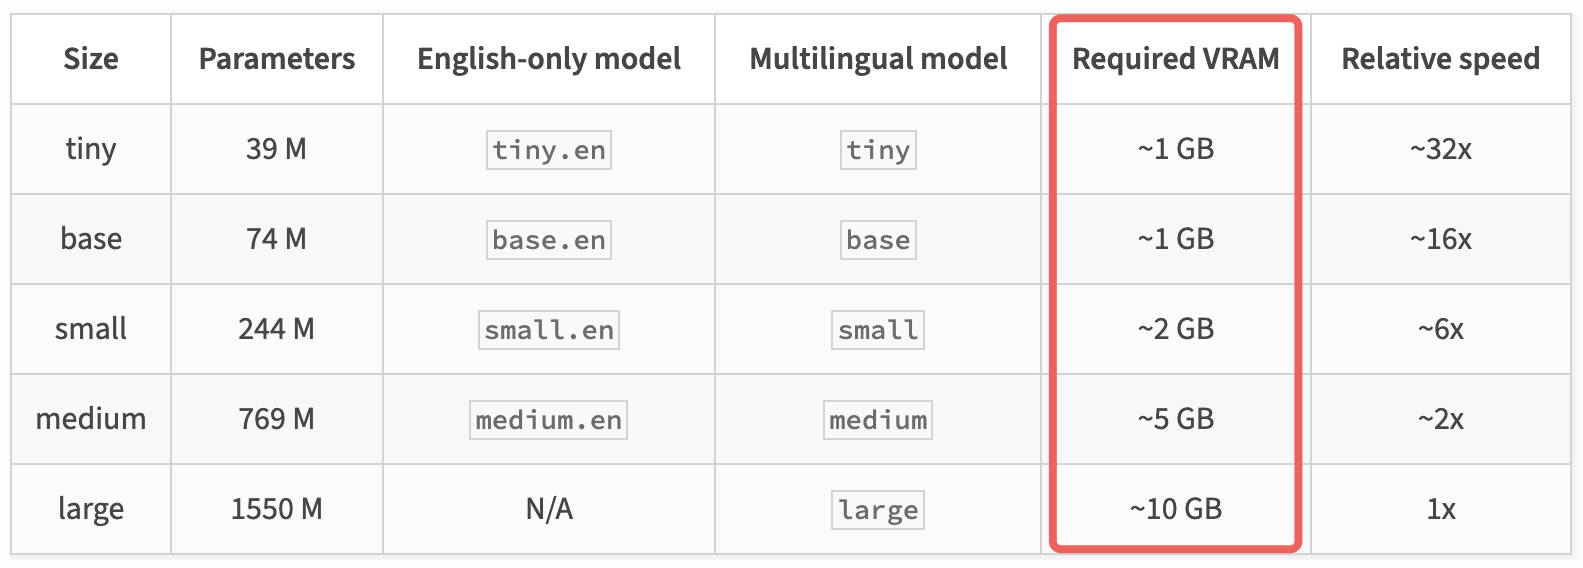
Whisper Models
The Whisper speech to text transcriber default model name is tiny. You can change the model name by updating the WHISPER_MODEL_NAME key in the .env file.
The following table lists the available Whisper speech to text transcriber model names. The performance of the transcriber will depend on the model name you select and the hardware capabilities of your computer.
Remember, if you don't have the hardware to run the models with sufficient performance, you can use the OpenAI API Audio service by setting the WHISPER_MODE environment variable to openai.
The OpenAI API Audio service is a paid service, review OpenAI Audio Model Pricing for more information.