Module 4: Build and deploy the solution
Index
- Module 1: Create an Azure IoT Central application
- Module 2: Set up your Raspberry Pi
- Module 3: Set up your development environment
- Module 4: Run the solution
- Module 5: Dockerize the Air Quality Monitor solution
- Home
Explore the solution
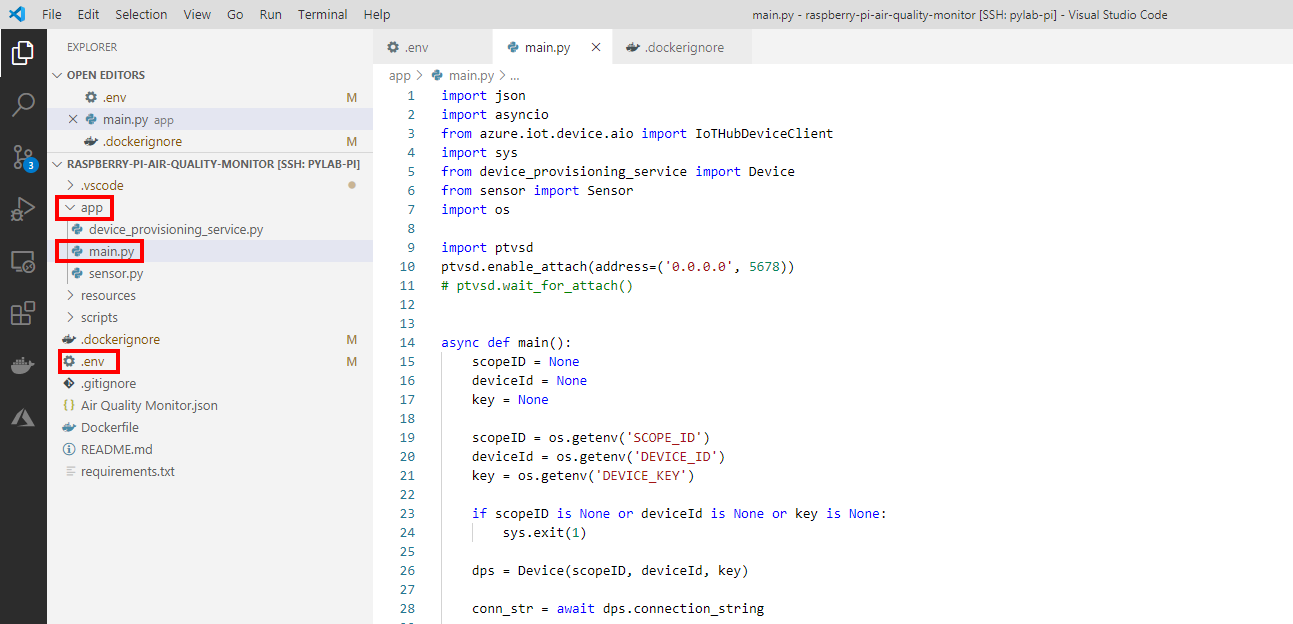
- Expand the app folder.
- Double click main.py, this is the main python application reads the sensor and sends the telemetry to Azure IoT Central.
Configure the IoT Central device connection
- Open the .env file
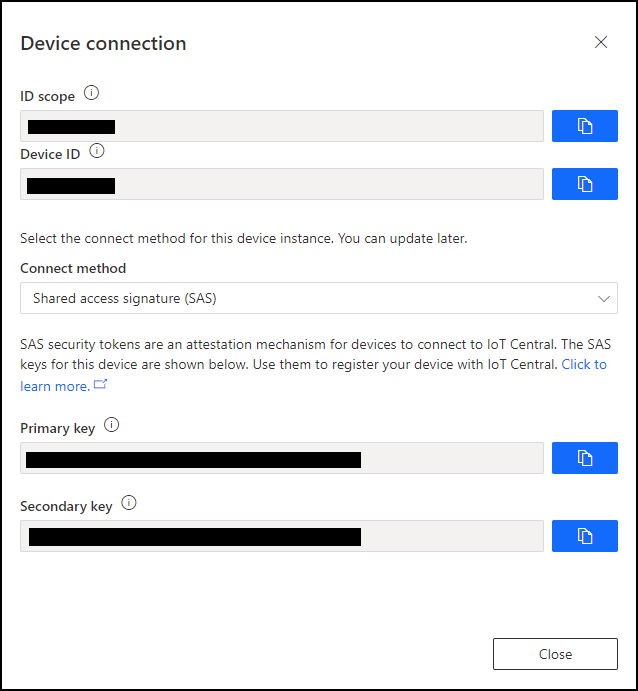
- Update with the Device Connection information from IoT Central. Remember, this was the Device Connection panel.
-
After you have updated the the .env file it will look similar to the following:
 SCOPE_ID=0ne0012C57C
 DEVICE_ID=rpi-air-quality
 DEVICE_KEY=jJitjNFnDPJpzKwDTSwur4wdJwCpnOrq8oonezQDzss=
Start the application
- Select the Run configuration. From the Visual Studio Code main menu, click View, then Run.
-
From the Run drop down menu, select Python: Current File
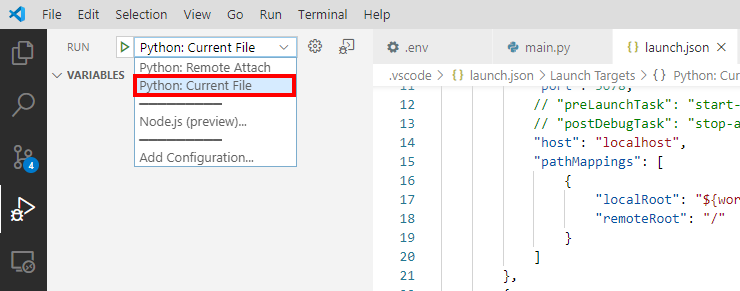
- Press F5 to start running and debugging the application on the Raspberry Pi.
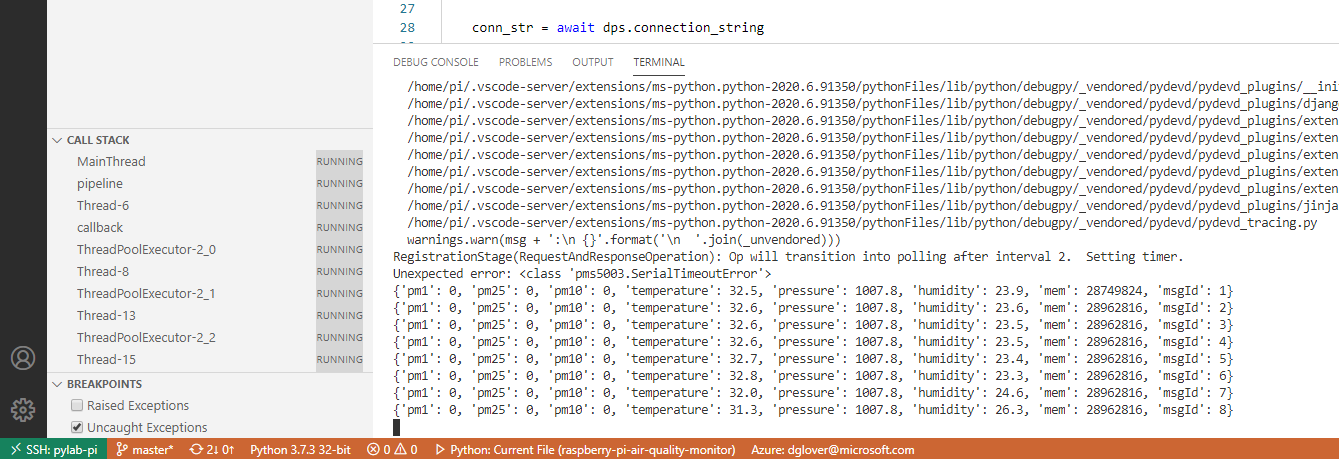
- Monitor the Visual Studio terminal window as the application starts. The application prints the telemetry as a JSON string in the Terminal window and then sends the telemetry to IoT Central.
-
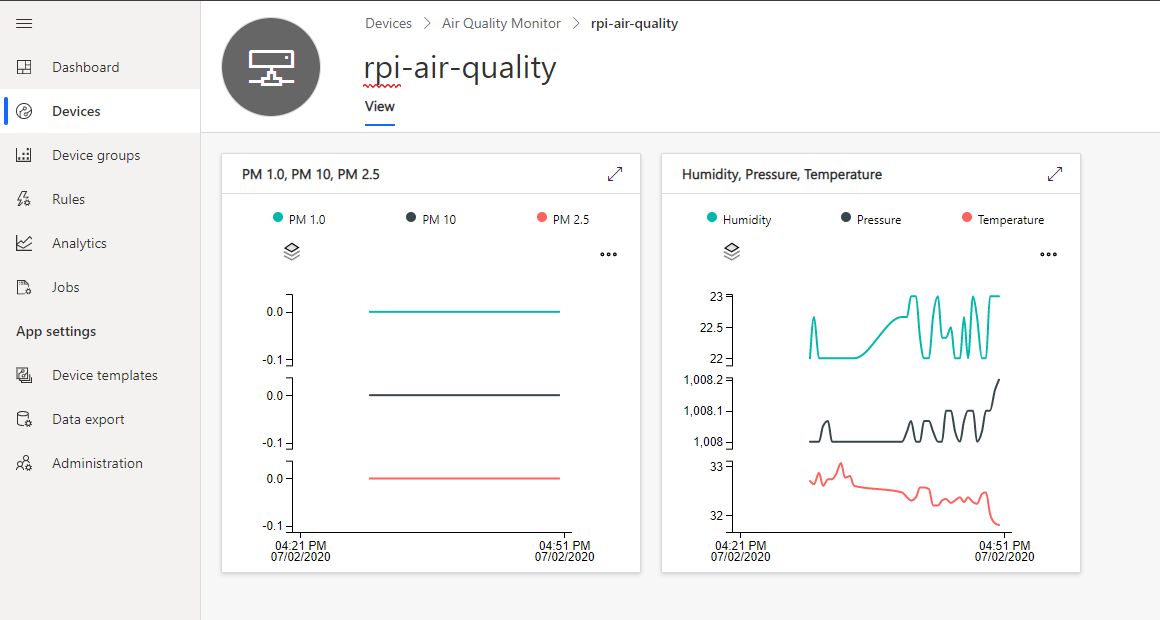
View the telemetry in Azure IoT Central
-
Switch back to IoT Central in the browser, and ensure you have select your device.
-
- Press Shift+F5 to stop the application.
Learning about the debugger
Check out the Debug your Python code article to learn more about debugging Python applications with Visual Studio Code.