Module 5: Dockerize the Air Quality Monitor solution
- Module 1: Create an Azure IoT Central application
- Module 2: Set up your Raspberry Pi
- Module 3: Set up your development environment
- Module 4: Run the solution
- Module 5: Dockerize the Air Quality Monitor solution
- Home
There are several reasons that you might want to dockerize your application. Including deploying to other devices, recovery, and deploying as part of an Azure IoT Edge solution. For now, we are just going to learn how to dockerize the application.
Exploring the Docker configuration
- Ensure the Visual Studio Code file explorer is in view. From the Visual Studio Code main menu click File, then click Explorer.
- Open the Dockerfile file. This file describes how to build the Docker image. You will see the image will be built upon the apline Python 3.7 base image.
Build the Docker image
-
Right mouse click on the Dockerfile. From the context menu, select Build image.
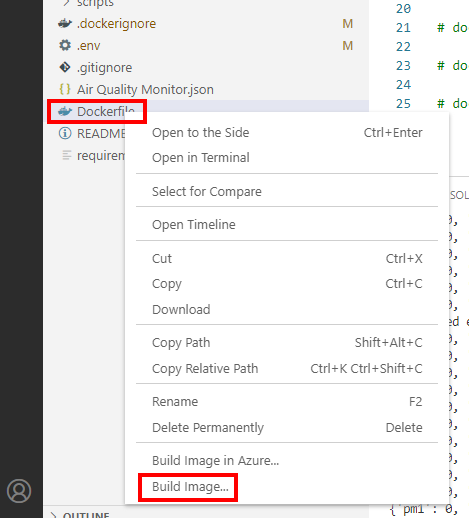
- You will be asked to name the image. press Enter to accept the default name.
- Observe the build process. It will take a few minutes depending on your internet connection speed and the what model Raspberry Pi you have.
Start the Docker Image
Now the Docker image has build we will want to start the image.
- Ensure you have stopped debugging the application.
-
From the Visual Studio Terminal window, type the following:
docker run -it --privileged -p 5678:5678 --rm --name enviroplus --env-file .env raspberrypiairqualitymonitor:latestThis starts the docker container in interactive mode. Privileged mode is required so the application can access the physical hardware sensor. The Python debugger ports are mapped into the container, and the .env environment file with the IoT Central connection information is also passed into the container.
Stopping the Docker container
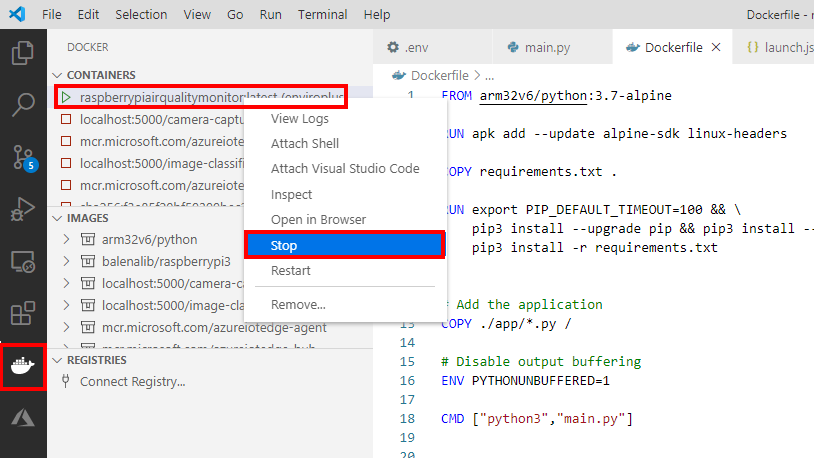
- From Visual Studio Code, click on the Docker icon in the sidebar menu.
-
Right mouse click on the raspberrypiairqualitymonitor running container, and from the context menu, select Stop
Setting the Docker container to start when the Raspberry Pi boot
Using the Docker restart feature is a handy way to automatically start the air quality monitor when the Raspberry Pi starts.
-
From the Visual Studio Code Terminal window, type the following:
docker run -d --privileged -p 5678:5678 --restart always --name enviroplus --env-file .env raspberrypiairqualitymonitor:latest
Attaching the debugger to the running Docker container
Some times it can be very handy to attach the debugger to a misbehaving application that is running inside of a container.
- Select the Run configuration. From the Visual Studio Code main menu, click View, then Run.
- From the Run drop down menu, select Python: Remote Attach
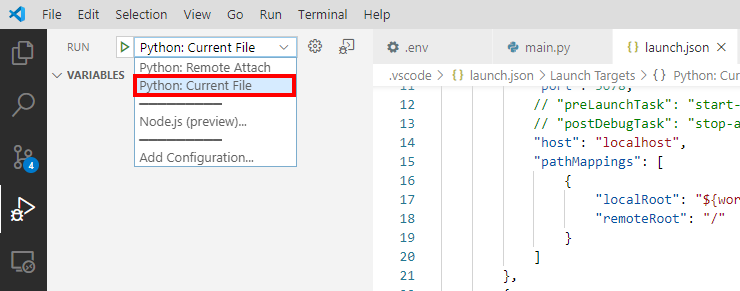
- Press F5 to attach the Python debugger to the application running in the container.
-
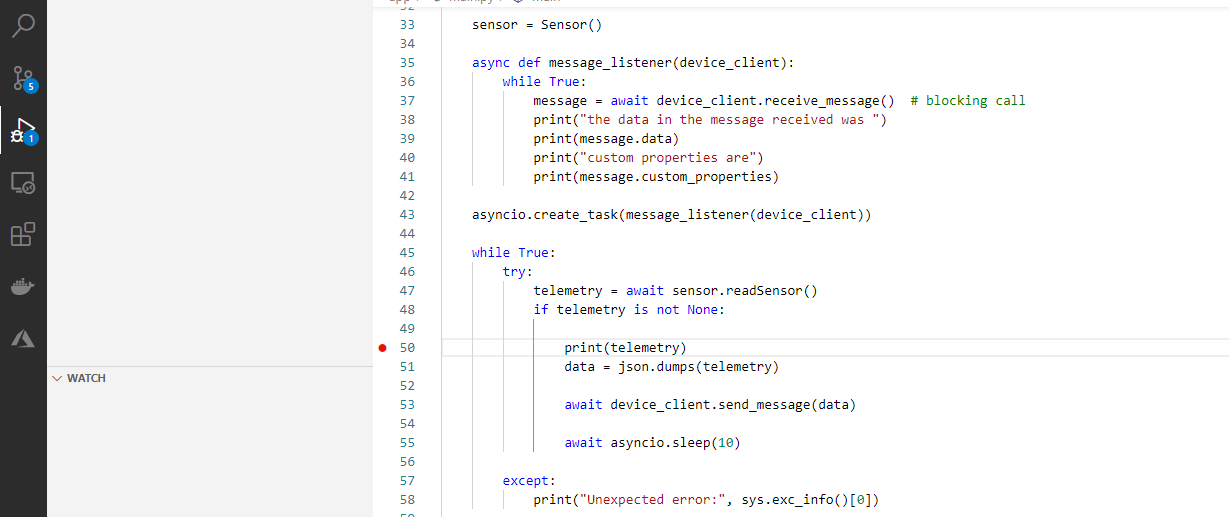
Switch to the main.py file, and set a breakpoint around line 50 in the code.
To set a breakpoint, click in the gutter, just to the left of the line numbers.
-
Now step through the code using the Debugger Toolbar, or press F5 to continue, F10 to over, F11 to step into, Shift+F11 to step out, and Shift+F5 to disconnect the debugger from the container.
Check out the Debug your Python code article to learn more about debugging Python applications with Visual Studio Code.