Deploy to Azure
The solution consists of three services:
- Proxy — The OpenAI-compatible API proxy (Container App)
- Admin — The management UI for events and resources (Container App, Entra ID authentication)
- Registration — The attendee registration SPA (Static Web App)
Setup
This repo is set up for deployment on Azure Container Apps using the configuration files in the infra folder.
Prerequisites
- An Azure subscription
- The Azure CLI logged in to a tenant where you have permission to create Entra ID app registrations
- An Azure region that supports the AI models you plan to deploy (models are deployed after
azd up)
Required permissions
| Requirement | Why |
|---|---|
| Azure subscription | To provision Container Apps, Storage Account, Container Registry, and Static Web App |
| Entra ID app registration | The deployment automatically creates an app registration for admin UI authentication. You need permission to create app registrations in your tenant (typically requires at least the Application Developer role) |
| Correct tenant | If you have multiple tenants, ensure az account show points to the correct one before running azd up. Use az login --tenant <tenant-id> to switch tenants |
Required software
Tested on Windows, macOS and Ubuntu 22.04.
Install:
Deploying
The recommended way to deploy this app is with Dev Containers. Install the VS Code Remote Containers extension and Docker, open this repository in a container and you'll be ready to go.
- Ensure Docker is installed and running.
-
Clone the repo:
git clone https://github.com/gloveboxes/azure-ai-proxy-lite.git -
Open the repo in VS Code.
- You will be prompted to
Reopen in Container, click the button to do so. This will build the container and open the repo in a container. -
In the VS Code dev container, open a terminal and set your Azure tenant and subscription IDs once:
export AZURE_TENANT_ID=<your-tenant-id> export AZURE_SUBSCRIPTION_ID=<your-subscription-id> -
Log in to both
azdand the Azure CLI (az). Both are required becauseazddeploys the infrastructure while the deployment hooks useazto create the Entra ID app registration:azd auth login --tenant-id "$AZURE_TENANT_ID" --use-device-code azd config set defaults.subscription "$AZURE_SUBSCRIPTION_ID" az login --tenant "$AZURE_TENANT_ID" --use-device-code az account set --subscription "$AZURE_SUBSCRIPTION_ID" -
Provision and deploy the proxy solution:
azd upYou will be prompted for:
- Environment name — keep it short (max 7 characters) to avoid invalid resource names.
- Azure subscription — select from your Azure account.
- Location — e.g., "centralus" or "eastus".
- swaLocation — location for the Static Web App (choose from the allowed list). Recommend deploying in the same location as the proxy.
- foundryLocation — location for the Azure AI Foundry project and model deployments.
The deployment will automatically:
- Create an Entra ID app registration for admin authentication
- Provision all Azure resources (Container Apps, Storage, Registry, etc.)
- Create an empty Azure AI Foundry project for you to deploy models into
- Grant the proxy managed identity access to the Foundry AI Services (no manual RBAC setup needed)
- Register the OIDC redirect URI for the admin container
- Configure the admin container with Entra ID env vars
- Build and deploy all three services
On completion, the following Azure resources will be provisioned:
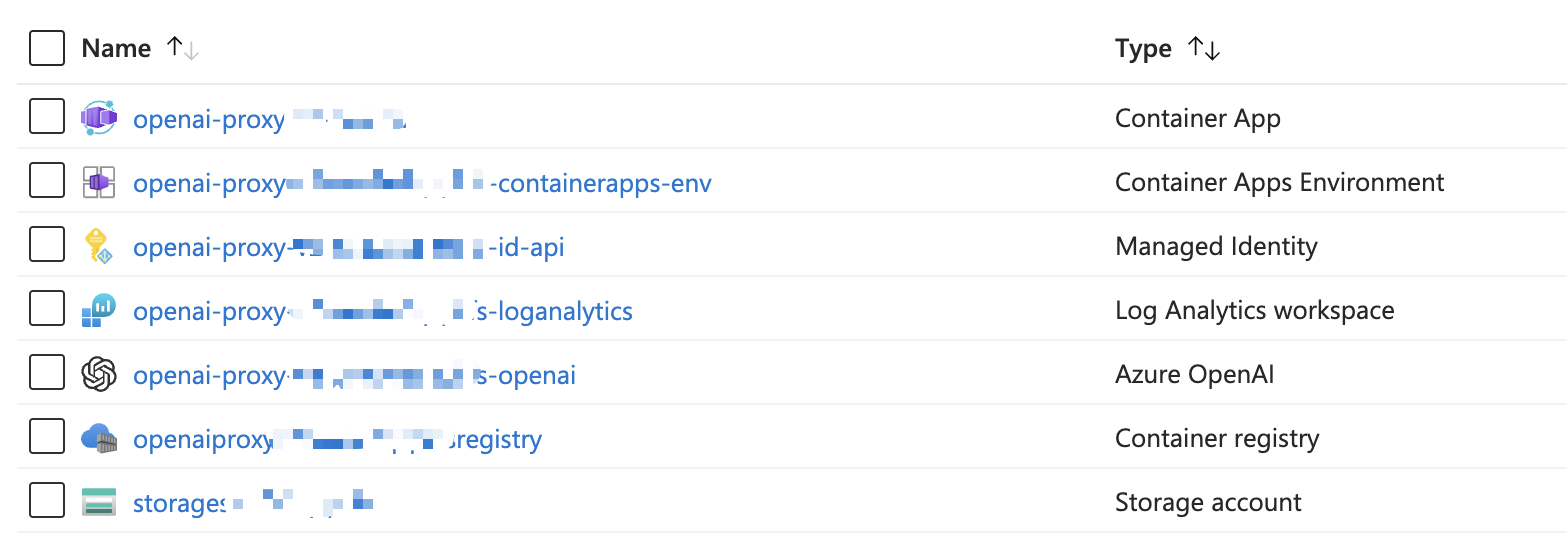
-
When
azdhas finished deploying you'll see the endpoints and Entra app registration details in the terminal.
Authenticating with the AI Proxy Admin
The admin UI uses Microsoft Entra ID (Azure AD) authentication when deployed to Azure.
- Navigate to the admin UI URL displayed after
azd upcompletes (or runazd env get-value SERVICE_ADMIN_URI). - You will be redirected to the Microsoft login page.
- Sign in with your organizational account.
- You'll be taken to the admin dashboard.
Note: The admin UI is accessible to any user in the Entra ID tenant where the app registration was created. For production use, consider restricting access using Azure AD Conditional Access policies or app role assignments.
Updating the deployed app
To make any changes to the app code, just run:
azd deploy [proxy | admin | registration]
The proxy service deploys the proxy API. The admin service deploys the admin management UI. The registration service deploys the attendee registration static web app.
To redeploy everything:
azd up
Next steps
- Deploy Azure AI Resources
- Map AI Resources to the AI Proxy
- Create and manage events
- Capacity planning
Deploy Azure AI Resources
- The deployment creates an empty Azure AI Foundry project in your resource group. The Foundry project is deployed as a trusted service, and the proxy's managed identity is automatically granted access to the Foundry AI Services — no manual RBAC configuration is needed. Open the Azure AI Foundry portal and deploy models (e.g., GPT-4.1, GPT-4.1-mini) into this project.
- The proxy supports model deployments from
Azure OpenAI Service,Azure AI Foundry Projects,MCP Servers, andAzure AI Search. - Make a note of the
endpoint_keyandendpoint_urlas you'll need them when you configure resources for the AI Proxy. - For Managed Identity deployments, see the Managed Identity guide.
Troubleshooting
If you encounter any issues deploying the solution, please raise an issue on the GitHub repo